What Underbody Coating Is and Why the Process Matters
Underbody coating is a protective layer applied to the underside of a car to shield the metal from rust, moisture, road salt, and physical damage. It is one of the most important protective treatments a car can receive especially in harsh climates or flood prone areas. But the quality of the protection depends heavily on how well the coating is applied. Skipping steps or rushing through the process leads to poor adhesion and weak protection that fails quickly. Understanding the step by step application process helps you appreciate why professional application matters and what a proper job actually involves.
Step One: Gathering the Right Materials and Equipment
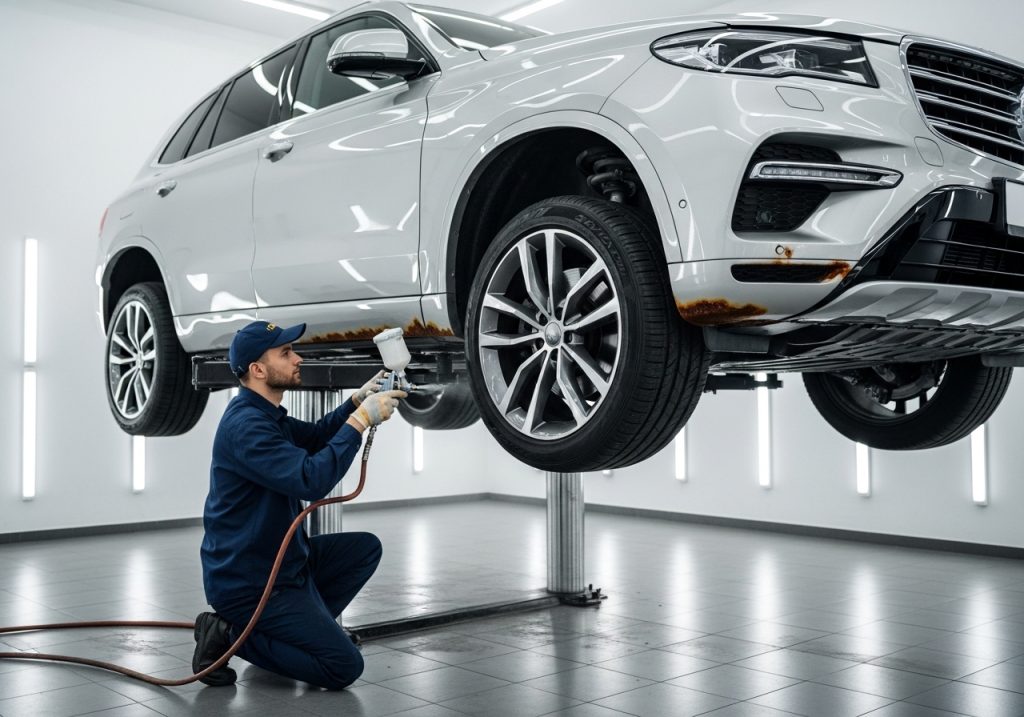
Before any work begins a professional gathers all the necessary tools and materials. This includes the underbody coating product itself which may be rubberized, wax based, or epoxy based depending on what the car needs. Other materials include a pressure washer, degreasers, wire brushes, sandpaper, masking tape, plastic sheeting, safety equipment, and a spray gun or aerosol applicator. Having everything ready before starting ensures the process flows smoothly without interruption. Using the right equipment also makes a big difference in how evenly and thoroughly the coating is applied. A spray gun gives more even coverage than a brush and reaches into tight spaces more effectively.
Step Two: Lifting the Car Safely
The car must be raised off the ground to give full access to the undercarriage. This is done using a hydraulic lift in a professional shop. The lift raises the car to a comfortable working height so the technician can see and reach every part of the underside clearly. Some professionals use heavy duty jack stands if a full lift is not available. The car must be completely stable and secure before anyone works underneath it. Safety is the top priority at this stage. A car that is not properly supported is extremely dangerous. Once the car is safely raised the technician does a first visual inspection of the undercarriage to assess the condition of the metal and identify any areas of existing rust or damage.
Step Three: Initial Cleaning With a Pressure Washer
The first cleaning step involves using a pressure washer to blast away loose dirt, mud, and road grime from the entire undercarriage. The underside of a car accumulates a thick layer of compacted dirt and debris over time. This dirt traps moisture against the metal and must be completely removed before any coating is applied. The pressure washer is used on all surfaces including the chassis rails, floor pans, wheel arches, and suspension components. Every corner and crevice is targeted to make sure no mud or debris is left behind. This initial wash is thorough and takes significant time because no coating will bond properly to a dirty surface.
Step Four: Degreasing the Surface
After pressure washing the surface must be degreased. The undercarriage is often coated in oil, grease, and fluid residue from the engine and drivetrain. These oily substances prevent coating from bonding to the metal. A professional grade degreaser is sprayed or applied across the entire undercarriage and left to sit for a few minutes to break down the grease. It is then rinsed away completely with clean water. In some cases this degreasing step may be repeated in heavily contaminated areas. The result is a surface that is clean and free of any oily residue that could interfere with the bonding of the protective coating.
Step Five: Drying the Surface Completely
After washing and degreasing the undercarriage must be dried completely before any coating is applied. Moisture trapped under the coating will cause it to bubble, peel, or fail to bond properly. Professionals use air blowers or compressed air guns to force water out of every gap, seam, and hollow section. The car may also be left in a warm environment for a period of time to allow complete drying. This step requires patience. Rushing the drying process and applying coating over a damp surface is one of the most common mistakes that leads to poor results. Every surface must be genuinely dry before moving forward.
Step Six: Treating Existing Rust
Once the surface is clean and dry the technician inspects the undercarriage closely for any existing rust. If rust spots are found they must be treated before the coating is applied. Applying coating over rust does not stop the rust from spreading. It only traps moisture under the coating and accelerates the problem. Light surface rust is treated by sanding or wire brushing the affected area until clean bare metal is exposed. A rust converter chemical may then be applied to neutralize any remaining rust particles and turn them into a stable compound. Heavily rusted areas may need more intensive treatment or repair before the coating can be applied. Treating rust properly at this stage is critical for long lasting results.
Step Seven: Masking Off Areas That Should Not Be Coated
Not every part of the undercarriage should receive coating. Certain components must be protected from overspray during the application process. These include brake components such as rotors, calipers, and brake lines where coating could affect performance. Exhaust pipes that get extremely hot must also be protected since coating on these surfaces could burn and create fumes. Drain plugs, sensors, and moving mechanical parts must be kept clear as well. The technician uses masking tape and plastic sheeting to carefully cover all of these components before spraying begins. This masking step requires careful attention to detail to make sure nothing important is accidentally coated while still leaving all the target metal surfaces fully exposed.
Step Eight: Applying the First Coat
With the surface prepared and all sensitive areas masked the first coat of underbody coating can be applied. The technician uses a spray gun connected to the coating material for even and consistent application. The spray is applied in smooth and overlapping passes across each section of the undercarriage. The goal is to build up an even layer that covers every surface without leaving thin spots or areas of uneven thickness. The first coat is usually lighter than the final coat. It serves as a base layer that bonds to the clean metal surface. The technician works methodically from one end of the car to the other to make sure no area is missed during this first pass.
Step Nine: Allowing the First Coat to Cure
After the first coat is applied it must be given time to cure before the next coat goes on. The curing time depends on the type of coating being used and the temperature and humidity in the shop. Rubberized coatings may take thirty minutes to an hour between coats. Epoxy based coatings may require longer cure times. Applying a second coat too soon traps solvents under the surface and weakens the final result. The technician checks the first coat by touch to make sure it has reached the right level of dryness before proceeding. During this waiting time the technician may inspect the first coat for any thin spots or areas that need extra attention in the next layer.
Step Ten: Applying Additional Coats
Once the first coat has cured the second coat is applied following the same process. Most professional underbody coating jobs involve two to three coats depending on the product and the level of protection required. Each additional coat builds up the thickness of the protective layer. A thicker coating provides better impact resistance and longer lasting protection. Areas that face particularly harsh conditions such as the wheel arches and the front sections of the undercarriage that take the most road debris impact may receive extra coats. The technician pays close attention to edges, seams, and joints where coating can be thinner and makes sure these critical areas are fully built up.
Step Eleven: Injecting Cavity Wax Into Hollow Sections
After the surface coats are applied the technician addresses the hollow internal sections of the chassis. Frame rails, sill sections, and other box sections are hollow metal tubes that trap moisture inside and rust from the inside out. A special cavity wax or penetrating oil is injected into these hollow sections through small access holes using a long flexible injection wand. The wax flows through the inside of the hollow section and coats the internal walls completely. This internal protection is something that spray coating cannot reach from the outside. It is an essential step in a thorough rustproofing treatment because internal rust is often the most destructive and hardest to detect kind.
Step Twelve: Removing Masking and Final Inspection
Once all coats have been applied and the cavity wax has been injected, the masking tape and plastic sheeting are carefully removed from the protected components. The technician then does a thorough final inspection of the entire undercarriage. Every surface is checked under bright lighting to make sure the coating is even, complete, and free of thin spots or missed areas. Any areas that need a touch up receive additional coating at this stage. The technician also checks that no coating has accidentally gotten onto brake components or other sensitive parts. This final inspection is what separates a professional job from a rushed one and ensures the car leaves the shop with complete and reliable protection.
Step Thirteen: Full Curing Period
After the job is complete the coating needs time to fully cure before the car is driven. Full curing can take anywhere from a few hours to a full day depending on the product used and the temperature conditions. During this time the car should be kept in a clean and dry environment. Driving the car too soon can damage the coating before it has hardened completely. The technician advises the car owner on how long to wait before driving and what to avoid during the initial curing period. Once fully cured the coating becomes hard, durable, and ready to handle everything the road throws at it.
Final Thoughts
The step by step process of applying underbody coating is thorough and detailed for good reason. Each step builds on the last and skipping any one of them compromises the final result. From lifting the car safely and cleaning the surface deeply to treating rust, applying multiple coats, and injecting cavity protection, every part of the process plays an important role. A properly applied underbody coating gives your car’s chassis strong and long lasting protection against rust, moisture, road salt, and physical damage. Trusting a professional who follows each step carefully is the best way to make sure your car gets the full protection it deserves.